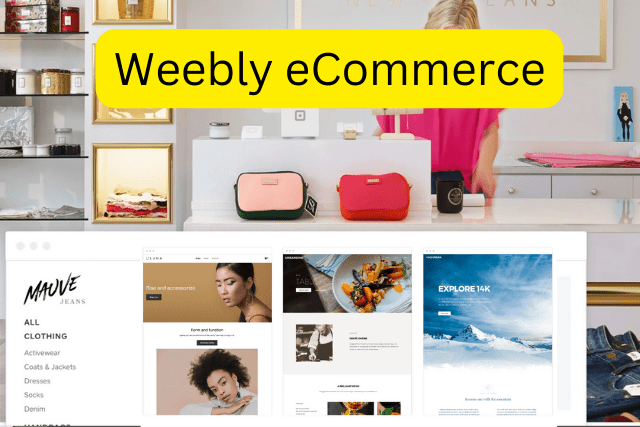
If you’re looking to build an e-commerce website using WordPress, you’re in luck. WordPress is a content management system (CMS) that lets you build a website or blog from scratch or improve an existing one. And with the addition of the WooCommerce plugin, you can turn your WordPress site into a fully functioning online store. In this article, we’ll show you how to build an e-commerce website using WordPress and WooCommerce.
Why should you use WordPress?
As a business owner, you know that in order to stay afloat and relevant, you need to keep up with the latest trends. Ecommerce is one of the hottest topics right now, and for good reason. By building an e-commerce website using WordPress and WooCommerce, you can reach a larger audience with your products and services than ever before.
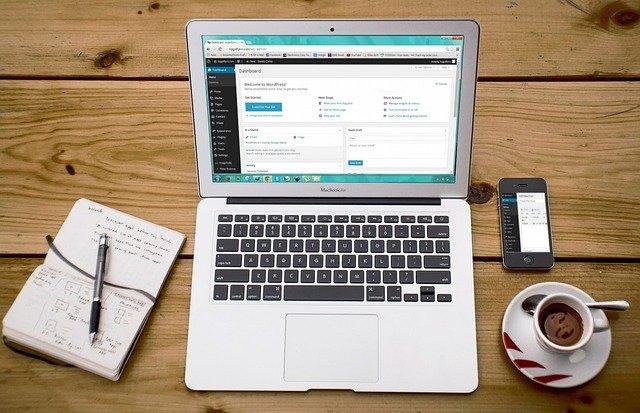
WordPress is a popular content management system that allows users to easily create and manage their websites. WordPress is an open-source project, which means that anyone can contribute to the development of the software. WordPress is used by millions of people around the world, including many large organizations. It has a large community of developers who can offer support and advice. With the addition of the WooCommerce plugin, you can turn your WordPress site into a fully functioning online store.
Let’s see how to build an e-commerce website using WordPress and WooCommerce.
Step 1: Do your research
When building an e-commerce website using WordPress, it is important to do your research. There are a lot of different plugins and themes available, and it can be overwhelming to try to figure out which one is the best for your needs. However, taking the time to do your research can save you a lot of time and money in the long run.
There are a few things you should keep in mind when doing your research. First, think about what kind of features you need on your website. Do you need a shopping cart? A payment gateway? Shipping options? Marketing plugin? Once you know what features you need, you can start narrowing down your choices.
Another thing to keep in mind is cost. Some plugins and themes are free, while others come with a price tag. If cost is a major factor for you, be sure to compare prices before making your final decision.

Step 2: Choose a domain name for your online store website.
There are a few things to consider when choosing a domain name for your online store. First, you’ll want to make sure that the domain name is relevant to your store and easy to remember. Second, you’ll want to choose a .com extension, as this is the most popular and recognizable extension. Finally, you’ll want to check to see if the domain name is available by searching for it on a domain name registrar like GoDaddy or Namecheap.
Step 3: Choose a hosting platform
There are many hosting platforms to choose from when you want to build an e-commerce website using WordPress. We recommend using a WordPress-specific host, like WP Engine, that offers features like staging areas and security specifically for WordPress websites.
Step 4: Install WordPress
Once you’ve chosen a host, you’ll need to install WordPress on your server. If your host doesn’t offer a one-click install of WordPress, don’t worry – it’s still pretty easy. You can find instructions on the WordPress Codex, the official documentation for all things WordPress.
Step 5: Select a WordPress theme
Now that you have WordPress installed and set up on your server, it is time to choose a theme for your e-commerce website. This is the design of your website, and there are literally thousands of themes to choose from—both free and paid. You can find free WordPress themes in the WordPress theme directory or by searching Google. Once you have found a theme you like, download it and upload it to your WordPress directory.
Next, activate the theme by going to the Appearance tab in the left-hand sidebar of the WordPress Dashboard. Click “Themes” and then “ Activate” under the theme you uploaded. Your e-commerce website should now have a new look!
Step 6: Add e-commerce functionality using WooCommerce
Assuming you have completed the first four steps in building an e-commerce website using WordPress, adding e-commerce functionality is the next step. This can be accomplished by using the WooCommerce plugin.
WooCommerce is a free plugin that allows you to turn your WordPress website into a fully functioning online store. It includes features such as product management, order management, payment gateway integration, and more.
To install WooCommerce, log into your WordPress dashboard and navigate to the Plugins section. From there, search for WooCommerce and click Install. Once the plugin has been installed, click Activate to start using it.
Step 7: Configure WooCommerce
After you have installed and activated WooCommerce, the next thing you need to do is configure it. To do this, go to the WooCommerce settings page by clicking on the link in the left-hand sidebar.
There are a lot of options here, but the most important ones are the general settings. Here you can set things like your shop’s name and address, currency, and tax rates.
Take some time to play around with all of the settings and options here until you have everything just the way you want it. Once you’re done, your WooCommerce-powered shop will be up and running!
Step 8: Set up payment processing
The next step is to set up payment processing so that you can start taking orders and receiving payments. There are a few different options for payment processors, but we recommend using Stripe & PayPal.
Stripe is a popular choice for WooCommerce stores because it is easy to set up and use. Plus, there are no setup fees or monthly charges – you only pay when you make a sale.
To get started with Stripe, sign up for an account and then follow the instructions to connect your WooCommerce store. Once your store is connected, you can start accepting payments immediately.
Another option for payment processing is PayPal. Setting up PayPal is easy and only takes a few minutes. You will need to create a PayPal account and then link it to your bank account. Once you have done this, you can start accepting payments through PayPal.
There are many benefits of using PayPal for your e-commerce website. It is a very user-friendly system that your customers will be familiar with. Also, PayPal is a very safe and secure way to process payments. Using PayPal can help you increase sales as it is a trusted payment method that customers are more likely to use.
Step 9: Adding products
Adding products to your WooCommerce store is simple. If you have products in another e-commerce platform, you can use the built-in importer to bring them over.
To add a product from scratch, go to your WordPress admin dashboard and click on Products. From there, you can either add a new product or import products from another e-commerce platform.
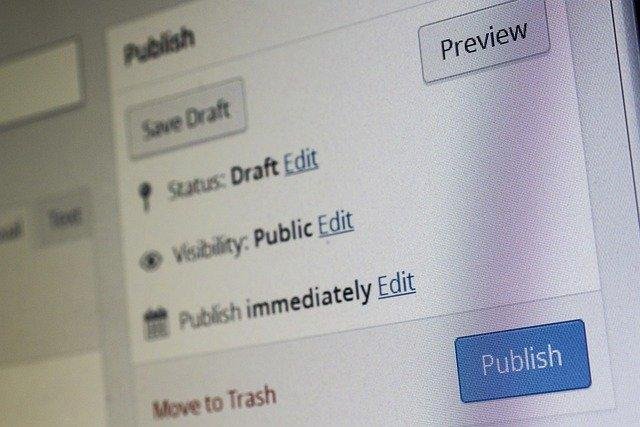
If you’re adding a new product, you’ll need to enter a name, description, price, and images for the product. You can also set shipping options and inventory levels for the product. Once you’ve added all the necessary information, click Publish to make the product live on your WooCommerce store.
Step 10: Create Your Pages
Next, you’ll need to set up your pages. You’ll need an “About” page, a “Shop” page, and a “Checkout” page at a minimum. You can also add other pages like a “Blog” or “Contact” page if you want.
To create your pages, go to the WordPress admin dashboard and click on “Pages.” Then click on “Add New.” Give your page a title and add some content. Repeat this process for each of the pages you want to create.
Once you’ve created all of your pages, go to the WooCommerce settings and configure the shop page and checkout page.
Step 11: Set up shipping methods
After you’ve added your products to your WooCommerce store, it’s time to set up shipping. Shipping is how you’ll get your products to your customers, so it’s an important part of the e-commerce process.
There are a few different ways to set up shipping in WooCommerce. You can use the built-in shipping options, which include flat-rate shipping and free shipping. You can also use third-party shipping plugins to add more options.
To set up shipping, go to the WooCommerce settings page and click on the “Shipping” tab. From there, you can add your shipping methods and rates. Be sure to add all the relevant information so that your customers know exactly how much they’ll be charged for shipping.
Step 12: Install the necessary plugins for an online store
Assuming you have completed all the previous steps, the next step is to install the necessary plugins for your online store. WordPress offers a wide variety of plugins, many of which are free. Although for an online store, you will need a minimum of a shopping cart plugin and a payment gateway plugin. Also, there are several other plugins that help you boost your sales.
There are a few other plugins that can help you boost your sales on your WordPress e-commerce site. One is the WPForms plugin, which allows you to create custom forms and surveys that you can use to gather information from your customers. Another helpful plugin is the Yoast SEO plugin, which helps you optimize your site for search engines so that people can easily find and purchase your products.
That’s all there is to it! You can now start selling products on your WooCommerce-powered website.
Tips for optimizing your WordPress e-commerce website
Building an eCommerce website using WordPress is a great way to get your online store up and running quickly and easily. However, there are a few things you can do to optimize your WordPress eCommerce website to make sure it runs smoothly and efficiently. Here are some tips for optimizing your WordPress eCommerce website:
Choose the right hosting plan
When you’re setting up your WordPress eCommerce website, be sure to choose a reliable and robust hosting plan that can handle the traffic and transactions you’re expecting. There’s nothing worse than an online store that crashes or is slow to load, so make sure your host can handle your traffic.
Install a caching plugin
A caching plugin will help speed up your website by caching static files and eliminating the need to load each page from scratch every time a visitor comes to your site.
If you’re looking for a great caching plugin, we recommend WP Rocket.
Enable compression on images
Using image compression tools like EWWW Image Optimizer will help speed up your website and reduce load times by compressing images so they take up less space and load more quickly.
Enable compression on HTML, XML, CSS, and JavaScript
Using compression tools like WP Super Cache, Autoptimize, or W3 Total Cache will help speed up your website by compressing your CSS and JavaScript files so they take up less space and load more quickly.
Tips for optimizing e-commerce product pages for search engines
Product SEO is one of the most important aspects of any e-commerce website. It’s what helps people find your products in search engines and decide to buy from you in the end. There are a few things you can do to make sure your products are well-optimized for search engines:
Keyword optimize your product titles
It’s important to optimize your product titles with keywords. This will help potential customers find your site more easily when they’re searching for products online.
There are a few things to keep in mind when keyword optimizing your product titles. Think about what terms people are likely to use when searching for your products. Make sure those keywords are included in your title in a way that makes sense grammatically. Don’t stuff your titles with too many keywords; this will only turn potential customers away.
Use keyword-rich product descriptions
If you want your e-commerce website to be successful, you need to make sure you’re using keyword-rich product descriptions. This means including relevant keywords throughout your product descriptions so that potential customers can easily find what they’re looking for.
Try to use natural language and avoid stuffy, technical jargon. And finally, don’t forget to proofread your work—you don’t want any typos ruining your chances of success! More effective product descriptions will help improve your chances of success in the e-commerce world.
Use high-quality images.
Make sure your product photos are clear and high-quality. This will help them stand out in the search results and entice potential customers to click through to your site. Images are often what will make or break a sale, so it’s important to choose ones that are sharp, clear, and professional looking.
There are a few different ways to go about getting high-quality images for your website. One option is to hire a professional photographer to take some shots specifically for your site. This can be a bit pricey, but if you have the budget it’s definitely worth it.
Another option is to purchase stock photos from a reputable site like Shutterstock or iStockphoto. These sites offer millions of high-quality images that you can use for your website at a very reasonable price.
Note: When you upload an image to your website, you should always include descriptive alt text. This helps search engines understand what the image is about, and it can also help people with visual impairments understand what the image is depicting.
Add relevant keywords to your tags and categories.
When adding tags and categories to your products, be sure to use keywords that are relevant to the product in question.
When you are creating tags and categories for your products, be sure to include relevant keywords. This will help potential customers find your products more easily when they are searching for them online.
For example, if you sell women’s clothing, some relevant keywords might be “women’s clothing,” “ladies’ clothes,” or “women’s fashion.” By including these keywords in your tags and categories, you will make it easier for people to find your products when they are searching for them online.
Including relevant keywords in your tags and categories is a simple way to improve your chances of being found by potential customers. Be sure to take advantage of this opportunity to increase traffic to your website.

How to promote your products on social media
If you’re selling products online, social media is a great way to promote your wares and drive traffic to your website. Here are some tips for using social media to sell your products:
Use attractive visuals.
When people are scrolling through their social media feeds, they’re more likely to stop and take notice of an eye-catching image than text alone. Make sure your product photos are high-quality and visually appealing.
Use persuasive copy.
In addition to attractive visuals, you’ll also need to use persuasive copy to get people interested in your products. Write compelling descriptions that highlight the features and benefits of your products.
Create shareable content.
If you want people to share your content with their followers, make sure it’s shareable. Creating shareable content is one of the best ways to get more eyes on your e-commerce website. Make sure the content is interesting and relevant to your audience. Use images and videos to break up the text and add visual interest. Include social sharing buttons so people can easily share your content with their followers.
Monitor your competitors’ SEO
Keep an eye on your competition. One way to do this is to monitor their SEO. This can be done by keeping track of their keyword rankings and their backlink profiles.
By knowing what keywords your competitors are ranking for, you can adjust your own SEO strategy accordingly. If they’re ranking for a lot of high-traffic keywords, you’ll want to make sure you’re doing the same.
Likewise, by checking their backlink profiles, you can get an idea of which websites are linking to them. If you see a lot of high-quality websites linking to your competitor’s site, reach out to those same websites and see if they’d be interested in linking to yours as well.
Add a blog section to your e-commerce website.
A blog section is a great way to add unique content to your e-commerce website. This will help your site rank higher in search engines and attract more organic traffic. The key is to produce high-quality, original content that provides value to your readers.
Here are a few reasons why you should consider adding a blog section to your e-commerce website:
- It will help improve your SEO.
- You can attract more organic traffic to your site.
- It’s a great way to build relationships with your customers and create loyalty.
- You can use your blog to showcase your products and services in a more creative way.
- A blog can also be used as a platform to launch new products and services.

Plan out the type of content you want to publish.
Whether it’s educational articles, How To’s, product reviews, or behind-the-scenes looks at your business, make sure the content is interesting and engaging. Choose a topic that is relevant to your products or services.
Write quality content that is well-researched and engaging.
Remember to include keywords throughout your post so that it can be easily found by search engines. Use images, infographics, or videos to break up your text and make your posts more visually appealing.
Promote your blog
Do the promotion of your blog posts on social media, in email marketing campaigns, or through other channels so that more people can see them. Be consistent! Aim to post at least one blog post per week and keep your content relevant and up-to-date.
Conclusion
WooCommerce is a plugin that turns a WordPress site into a fully functioning online store. It’s the most popular e-commerce platform on the web, and it’s perfect for small businesses and startups.
Building an e-commerce website using WordPress and WooCommerce is relatively simple and doesn’t require any coding knowledge. In just a few steps, you can have your very own online store up and running in no time.