Migrating your WordPress site to a new hosting provider is a significant task that requires careful planning and execution. Whether you’re looking for better performance, more features, or simply a more reliable host, the migration process needs to be handled meticulously to avoid compromising your site’s functionality and security.
In this detailed guide, we’ll walk you through every step of the migration process, ensuring that you move your WordPress site to a new host smoothly and without losing any data.
From assessing your current hosting situation to monitoring and optimizing your new environment, this guide covers everything you need to know.
Why Migrate Your WordPress Site?
Before diving into the migration process, it’s important to understand why you might need to migrate your WordPress site to a new host. Common reasons include:
- Performance Issues: Your current host may not be providing the speed and reliability your site needs.
- Limited Features: As your site grows, you might require more advanced features that your current host doesn’t offer.
- Cost Concerns: You may find a more affordable hosting solution that offers better value for your money.
- Customer Support: Poor customer service from your current host can be a strong reason to move.
No matter the reason, a successful migration requires a strategic approach. Let’s get started with the first step.
1. Assess Your Current Hosting Situation
Before making any changes, it’s crucial to assess your current hosting environment. This step will help you understand the limitations of your current host and what to look for in a new provider.
Evaluate Server Performance
Start by assessing your site’s speed and responsiveness. Slow loading times can frustrate users and negatively impact your search engine rankings. Tools like Google PageSpeed Insights can help you identify performance bottlenecks.

Check Uptime Reliability
Uptime is critical for your website’s accessibility. Frequent downtime can result in lost traffic, decreased revenue, and a damaged reputation. Check your current host’s uptime records and see if there have been any significant outages.
Examine Scalability Options
As your site grows, you’ll need more resources like storage space and bandwidth. Evaluate whether your current host can accommodate this growth without sacrificing performance. If not, it’s time to consider a more scalable solution.
2. Choose a New Hosting Provider
Selecting a new hosting provider is one of the most important decisions in the migration process. Your choice will impact your site’s performance, security, and overall user experience.
Research Different Hosting Options
When researching new hosts, consider the following factors:
- Server Reliability and Uptime Guarantees: Ensure the host has a strong uptime record.
- Bandwidth and Storage Capabilities: Choose a plan that can accommodate your current and future needs.
- Security Features: Look for SSL certificates, firewalls, and regular backups.
- Customer Support Quality: Good customer service is essential for addressing any issues during migration.
Consider Performance, Support, and Pricing
- Performance: The host should offer fast server speeds and the latest technology to ensure your site runs efficiently.
- Support: Opt for a provider with 24/7 support and a good reputation for resolving issues quickly.
- Pricing: Compare the features and services offered at various price points to ensure you’re getting the best value.
3. Back Up Your WordPress Site
Backing up your site is a critical step that ensures you have a secure copy of your data before making any changes. This backup will serve as a safety net in case anything goes wrong during the migration.
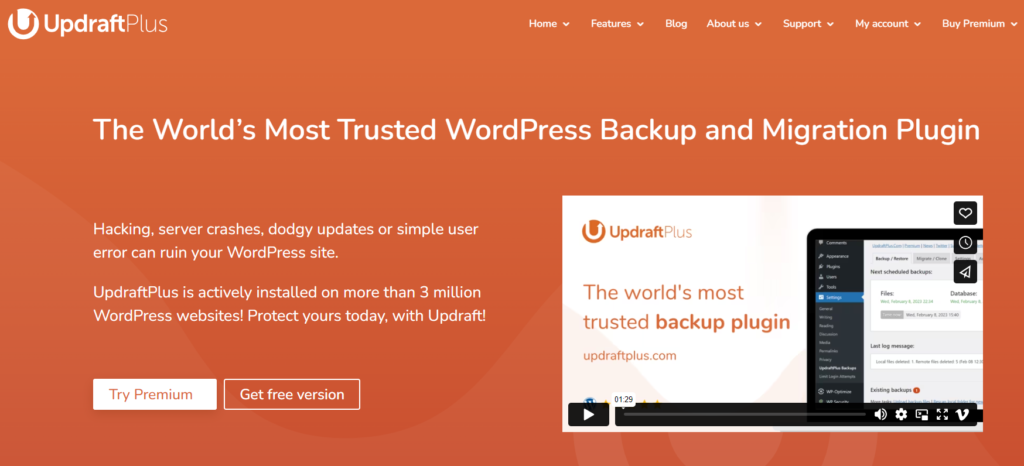
Use a Reliable Backup Plugin
A reliable backup plugin is essential for creating a complete backup of your WordPress site. Plugins like UpdraftPlus and BackupBuddy offer comprehensive features, including automatic backups, scheduled backups, and cloud storage integration.
Save Your Backup Files in a Secure Location
Once you’ve created a backup, store it in a secure location. Cloud storage services like Google Drive or Dropbox are excellent options for keeping your backup files safe and accessible. Make sure to keep multiple copies of your backups to further reduce the risk of data loss.
4. Set Up Your New Hosting Account
With your site backed up, it’s time to set up your new hosting account. This process involves selecting the right hosting plan, setting up your account, and preparing the environment for your WordPress installation.
Choose the Right Hosting Plan
Your new hosting plan should align with the needs of your WordPress site. If your site is growing, consider a plan that offers more resources and scalability options. Managed WordPress hosting is also a great option for those who prefer a host that handles much of the technical work.
Install WordPress on Your New Hosting Account
Most hosting providers offer one-click WordPress installation, making it easy to set up your site on the new server. Follow the hosting provider’s instructions carefully, and be sure to install the latest version of WordPress.
Update DNS Settings
Once WordPress is installed, you’ll need to update your DNS settings to point your domain to the new host. This process can vary depending on your domain registrar, but it generally involves changing the nameservers to those provided by your new host.
5. Transfer Your Files to the New Host
Now that your new hosting account is ready, it’s time to transfer your WordPress files and database to the new server.
Export and Import Database
Start by exporting your database from your old host using tools like phpMyAdmin. Save the database as an SQL file. Then, log in to your new host’s phpMyAdmin and import the SQL file into the new database.
Transfer Website Files via FTP
Using an FTP client like FileZilla, connect to both your old and new hosts. Download all website files from the old host and upload them to the new host. Be sure to place the files in the correct directory, typically the root directory (public_html).
Troubleshoot Common Issues
After the transfer, check for any issues like broken links or missing images. These problems often arise due to different file paths on the new host. Correct any broken paths and test your site thoroughly.
6. Test Your Site on the New Host
Before making your site live on the new host, it’s crucial to test everything to ensure it works correctly in the new environment.
Verify Site Functionality
Visit each page of your website to check that all content is displaying correctly and that all links work. Test interactive features like forms, shopping carts, and search functions to ensure they are functioning as expected.
Check for Errors and Compatibility
Use tools like Google Search Console to identify any errors that may have occurred during the migration. Also, test your site across different browsers and devices to ensure compatibility.
7. Update Your DNS Settings
To complete the migration process, you’ll need to update your DNS settings to point your domain to the new host. This step is crucial to ensure that visitors are directed to the new server when they enter your domain name.
Modify DNS Records
Log in to your domain registrar and access the DNS management section. Update the A record with the IP address of your new host. If you’re using a third-party DNS service, make sure to update the records there as well.
Propagation Time
DNS changes can take up to 48 hours to propagate fully. During this time, your site may be accessible from both the old and new hosts, depending on the visitor’s location. Avoid making any changes to your site until the DNS propagation is complete.
8. Cancel Your Old Hosting Account
Once your site is up and running on the new host, and you’ve confirmed that everything is working correctly, it’s time to cancel your old hosting account.
Transfer Your Domain Name
If your domain is registered with your old host, transfer it to your new host or a third-party registrar. This ensures that you retain control over your domain.
Test Your Site Again
Before cancelling the old account, run another round of tests to ensure everything is functioning correctly on the new host. This includes checking for broken links, missing images, and any other issues that might have arisen.
Cancel the Account
After confirming that your site is fully operational on the new host, contact your old hosting provider to cancel your account. Make sure you have backed up any remaining data before doing so.
9. Monitor and Optimize Your New Hosting Environment
After completing the migration, it’s essential to monitor your site’s performance and optimize the new hosting environment to ensure your site runs efficiently.
Monitor Site Performance and Uptime
Use monitoring tools like UptimeRobot or Pingdom to track your site’s uptime and performance. Set up alerts to notify you of any downtime or performance issues, so you can address them promptly.

Implement Optimization Techniques
To improve your site’s speed and security:
- Optimize Images: Compress images without losing quality using tools like TinyPNG.
- Enable Caching: Use caching plugins like W3 Total Cache to reduce server load and speed up page loading times.
- Minify CSS and JavaScript: Minify code to remove unnecessary characters and speed up your site.
- Enhance Security: Regularly update WordPress, themes, and plugins. Implement a firewall and use strong passwords to protect your site from attacks.
By continuously monitoring and optimizing your hosting environment, you can ensure that your WordPress site remains fast, secure, and reliable.
FAQs
1. What is the average cost of transferring a WordPress site to a new host?
The cost of migrating a WordPress site can vary depending on the complexity of the site and the hosting provider chosen. On average, it can range from $100 to $500 or more. Professional services may charge higher fees, but they can ensure a smooth and secure transition.
2. Can I transfer my WordPress site to a new host without any downtime?
Yes, it’s possible to transfer your WordPress site with minimal or no downtime. By using proper migration techniques, such as backing up your data and updating DNS settings promptly, you can avoid significant disruptions.
3. What technical requirements should my new hosting provider meet for a smooth migration?
Your new hosting provider should offer reliable uptime, fast server speeds, compatibility with the latest PHP and MySQL versions, ample storage and bandwidth, and strong technical support. These features ensure a smooth migration process and reliable site performance.
4. Should I update my themes and plugins before transferring my WordPress site?
Yes, updating your themes and plugins before migrating your site is essential. This ensures that you have the latest security patches and bug fixes, reducing the risk of issues during the migration process.
5. How long does the WordPress site migration process take?
The time required for a WordPress migration depends on the size and complexity of your site. A simple site might take just a few hours, while a larger, more complex site could take a day or more. Thorough testing is crucial to ensure a successful migration.
6. What should I do if I encounter issues during the migration process?
If you encounter issues during migration, start by checking the basics: ensure that all files have been transferred correctly, that the database is properly imported, and that DNS settings are correct. If problems persist, consult your new hosting provider’s support team or seek professional assistance.
Conclusion
Migrating your WordPress site to a new host may seem daunting, but with careful planning and execution, it can be a smooth and successful process. By following the steps outlined in this guide—assessing your current host, choosing a new provider, backing up your site, transferring files, and optimizing your new environment—you can ensure that your site remains secure, fast, and fully functional throughout the migration.
A well-executed migration not only prevents downtime and data loss but also enhances your site’s performance, contributing to a better user experience and helping your online presence grow.